Creating a New Clinical Communication Message
When creating a new Clinical Communication message, there are three mandatory fields:
-
Prescriber
-
Message
-
Subject
When any of these three fields are blank, a validation message instructs you to enter the missing information.
Communications can only be sent to prescribers who are PrescribeIT®-enabled. The following prompt displays if a prescriber is not PrescribeIT®-enabled.

A new Mail message sent to a prescriber through PrescribeIT® can be created three ways:
-
In the Messages tile
-
From the Workbench or patient's Profile
-
From an incoming PrescribeIT® transaction
Use the dropdowns below to learn more about each method.
Creating a new message from the Messages tile opens a blank Mail window. This method is ideal when sending a general communication to the prescriber.
To create a new message from the Messages tile:
-
From the Messages tile, select New.

The Mail window appears.
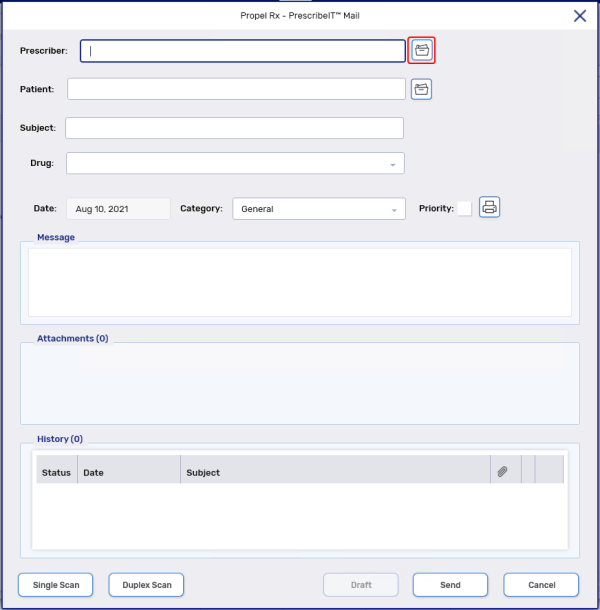
-
Enter information as required. For more information, see PrescribeIT® Mail Window Overview.
-
Select Send.
Creating a new message from the Workbench or the Patient Profile may populate the patient, doctor and/or drug information. This method is ideal when sending a communication to the prescriber about a specific patient or prescription.
The new message can be created with or without a prescription selected.
-
If a PrescribeIT® prescription is selected, the Prescriber, Patient and Drug fields are auto-populated.
-
If a non-PrescribeIT® prescription is selected, the Prescriber and Patient fields are auto-populated. The drug information is entered in the Message field.
-
The Patient field is auto-populated when no prescriptions are selected on the patient's Profile.
To create a new message from the Workbench or the patient's Profile:
-
From the Workbench or the patient's Profile, select a prescription - Optional.
-
Select RX > Mail.
If you select multiple prescriptions and they belong to different split Groups, the Mail button will be disabled. For more information, see Split Rx.
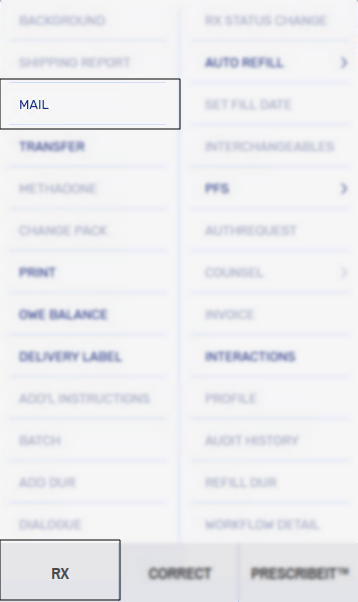
The Mail window appears.
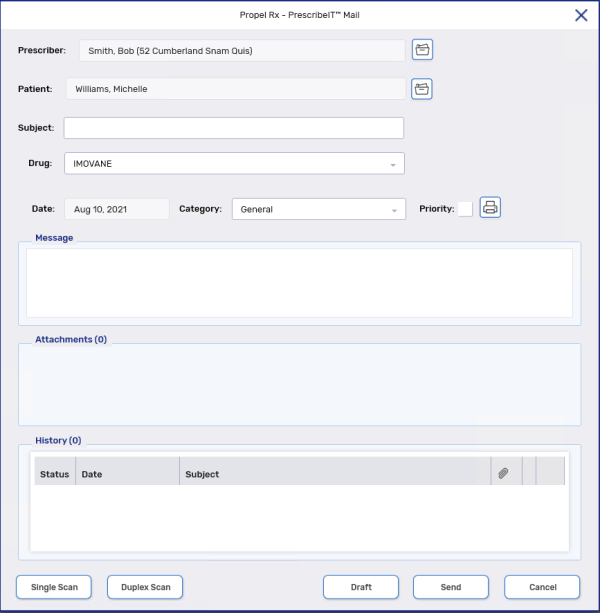
As described above, the window, may or may not be populated depending on how the window was opened (in the example shown here, the window was opened from the Workbench and a prescription was not highlighted).

-
Enter information as required. For more information, see PrescribeIT® Mail Window Overview.
-
Select Send.
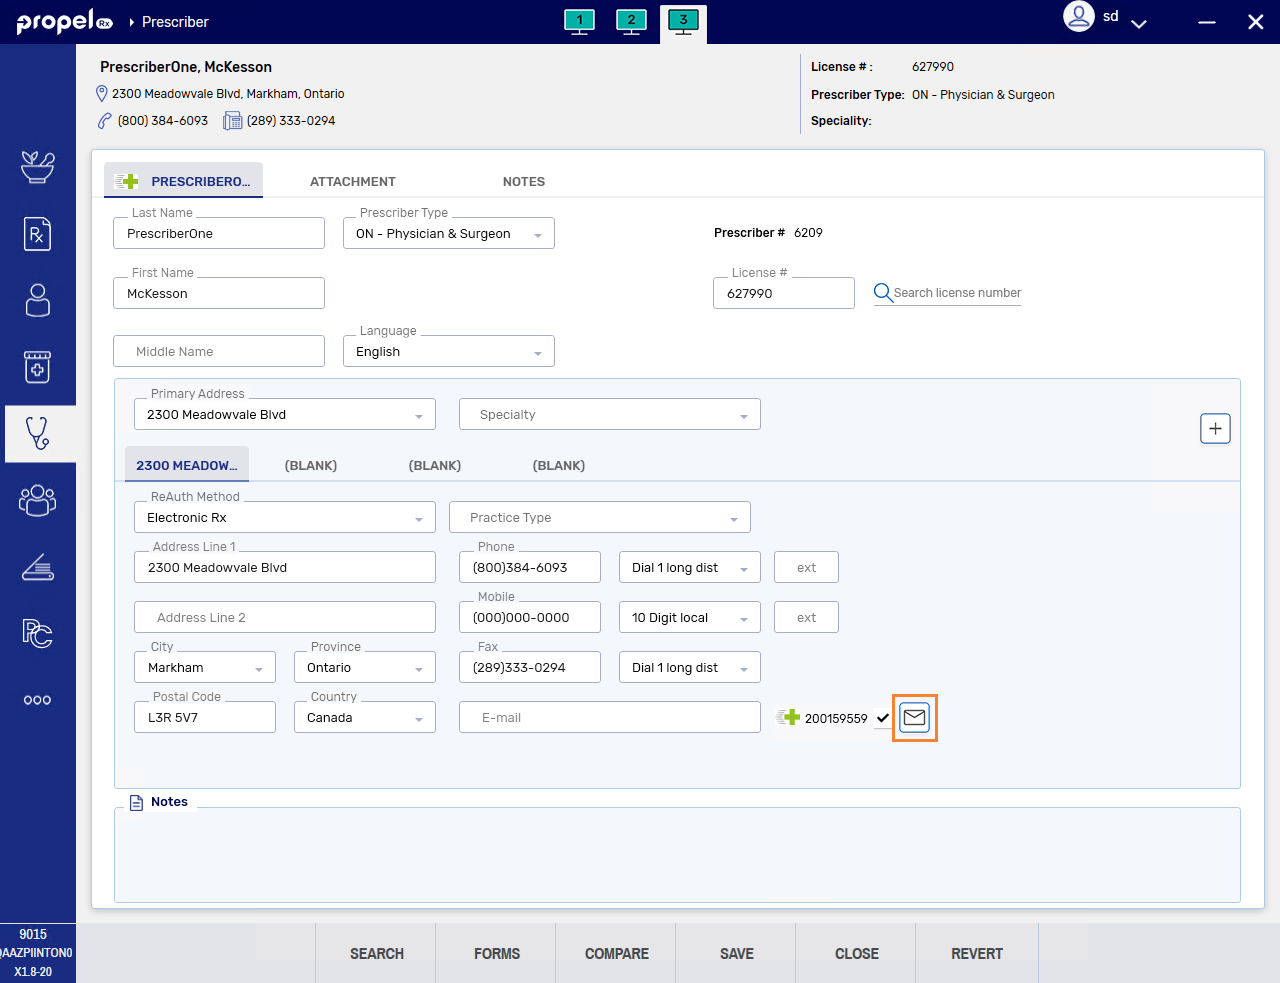
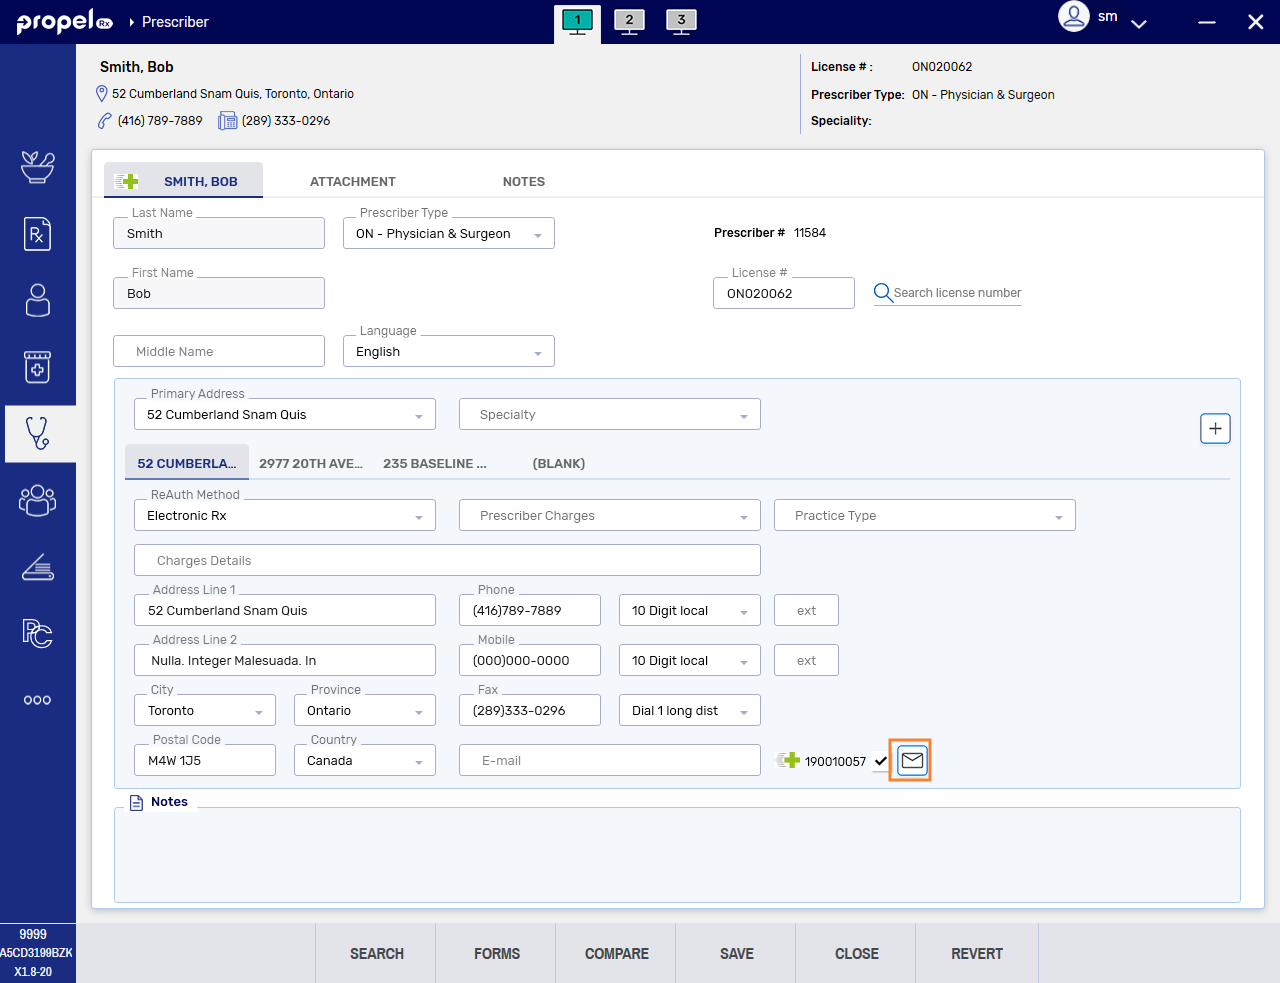
Creating a new message from the Prescriber Folder opens the Mail window with the prescriber auto-populated. You can enter a patient if you choose but you cannot specify a drug for the communication.
To create a new message from the Prescriber Folder:
-
From the Prescriber Folder, select the applicable address sub-tab.
-
Select the Mail button
 beside the Location ID.
 The Mail window appears.
-
Enter information as required. For more information, see PrescribeIT® Mail Window Overview.
-
Select Send.
A new message can be created from incoming PrescribeIT® transactions, such as a New Rx Request, Authorization Request Response or a Cancel Rx Request.
To create a new message from an incoming PrescribeIT® transaction:
-
From the Workbench > Data Entry queue, select the PrescribeIT® transaction.
-
Select Process.
-
If a New Rx Request, Authorization - Approved, or Authorization - Approved with Changes transaction is selected, the Intake window appears. For more information, see PrescribeIT® Intake Window Overview.
-
If a Cancel Rx Request transaction is selected, a Cancel Rx Request window appears. For more information, see Cancel Rx Requests Received through PrescribeIT®
-
If an Authorization - Under Review or an Authorization - Denied transaction is selected, an Authorization Request Response window appears. For more information, see Processing an Authorization Request Received Through PrescribeIT®.
-
-
Select the envelope icon
 . The Mail window opens.
The Prescriber, Patient and Drug fields auto-populate with the information from the PrescribeIT® transaction.
-
Enter information as required. Form more information, see PrescribeIT® Mail Window Overview.
-
Select Send.
Managing Attachments in a Clinical Communication
Attachments can be added to or received in a Clinical Communication message.
-
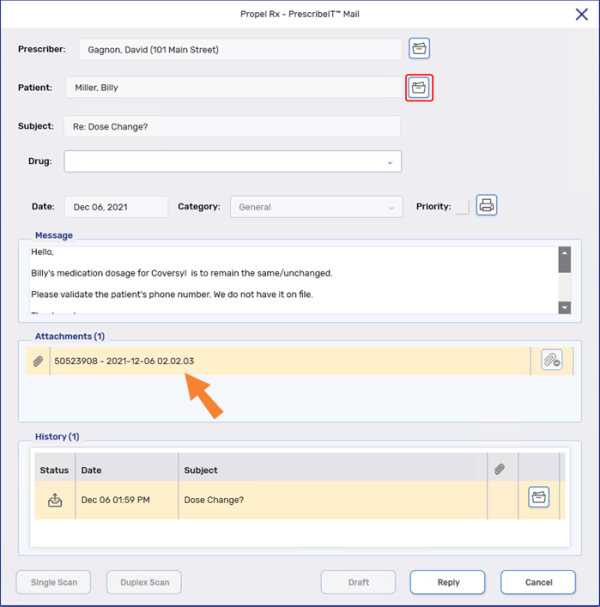
To add an attachment, select the Single Scan or Duplex Scan button to scan and attach a document to the message. The scanned document appears in the Attachments section of the Mail window.
-
To open an attachment, double-click on it.
Below is an example of an incoming message that contains an attachment.
Sending Clinical Communication for a Bundled Transaction History
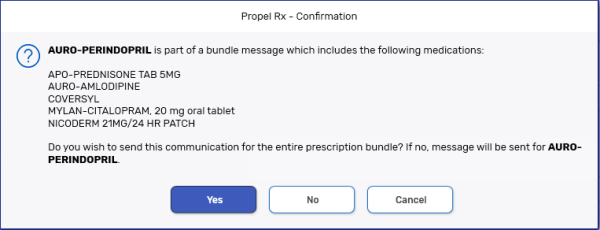
When creating a message for a transaction that is part of a bundle, a prompt confirms if the new communication is for all transactions in the bundle or for the specific transaction selected.
-
Yes - the communication is created for all transactions in the bundle. The Drug field pre-populates with all medications in the bundle.
-
No - the communication is created only for the selected transaction. The Drug field pre-populates with the corresponding medication.
-
Cancel - the prompt closes and the screen returns to the previous window.
Scenarios for Sending Clinical Communication Messages
There are a few scenarios that can occur when sending Clinical Communication.
Table 1. PrescribeIT® Clinical Communication scenarios
| Scenario | Description |
|---|---|
|
Patient is not sync'd with PrescribeIT® |
The patient must be synchronized with PrescribeIT® for them to be associated with a message. How can you tell that the patient is not synchronized yet? A red box will be around the patient folder icon |
| Non-PrescribeIT® prescription | You can send a message for a non-PrescribeIT® prescription. If the prescription is not associated with PrescribeIT®, the details will display in the body of the message with the drug information, and the medication Order ID will be blank. |
